Physical Count
Items > Physical Count
Physical counts are used to calibrate TITAN's inventory record to match the site's actual physical inventory. Full physical counts are typically done monthly. Spot checks are used to correct selected items in between full counts.
Physical Count Screen
-
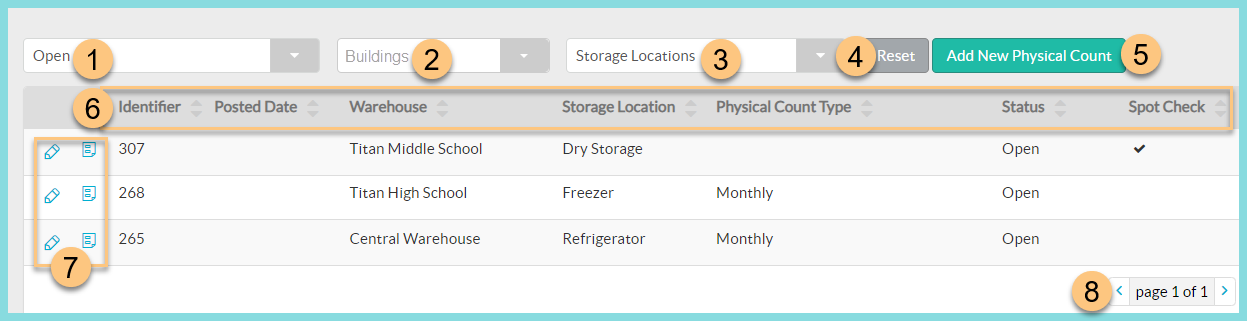
Filter results by physical count status. (All Statuses, Open, Pending, Posted, Posting)
Default: Open -
Filter physical counts by warehouse Buildings.
-
Filter physical counts by Storage Locations.
-
Click Reset to restore search parameters to their defaults.
-
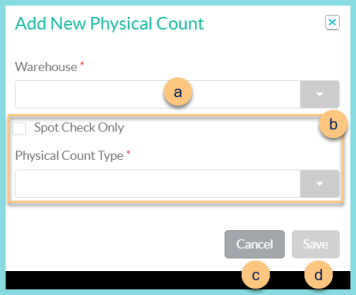
Click Add New Physical Count to add a new physical count.
-
Select a Warehouse and then the corresponding Storage Location (not pictured).
Note: A separate physical count must be done for each storage location. -
Select Spot Check Only or select a Physical Count Type.
Note: A spot check update counts only the manually added items. A full physical count populates the count of all items that TITAN has an on hand record for at the selected warehouse and storage location. All items in a Storage Location will be updated once the Physical County is posted. -
Click Cancel to return to the previous screen without creating a new count.
-
Click Save to create and open the Physical Count.
-
Headers: Click Identifier, Posted Date, Warehouse, Storage Location, Physical Count Type, Status, or Spot Check to sort results by that column.
-
View or Edit Details: Click the Pencil to edit open physicals. Hover over the Paper to see date, time, and user details.
-
Click the < > Arrowsto scroll through pages as needed.
Individual Physical Count
-
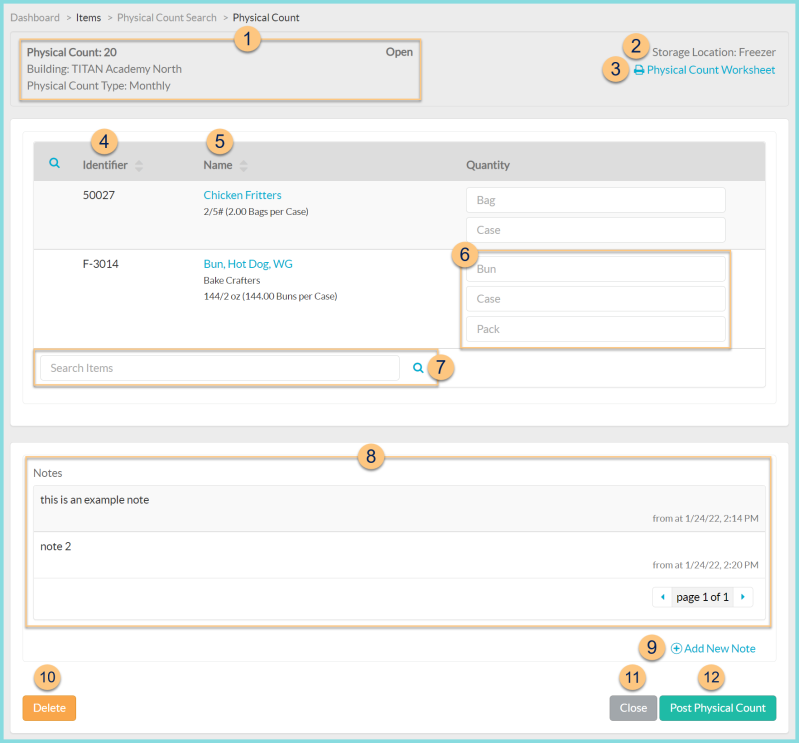
Notice the Format (spot check or physical count), Identifier, Warehouse, Physical Count Type, and Status.
-
Notice the Storage Location.
-
Click Print Physical Count Worksheet to run a copy of the physical count worksheet report.
-
Click Identifier to sort by item identifier.
-
Click Name to sort by item name. Notice the item description and number of base units of measure per the preferred unit of measure.
-
Enter the Quantity of the physical count units of measure.
Note: A spinning gear will appear as you enter quantities. Click or Tab away from the quantity field to save changes. The entry has been saved when the gear is no longer visible.
Select the Sub-Location (not pictured) where the item is stored.
Note: the sub-location(s) will populate on a non-spot check format. The sub-location(s) must be indicated on a spot check. If the item is stored in multiple sub-locations, add the item to the count multiple times and indicate the quantity in each sub-location. -
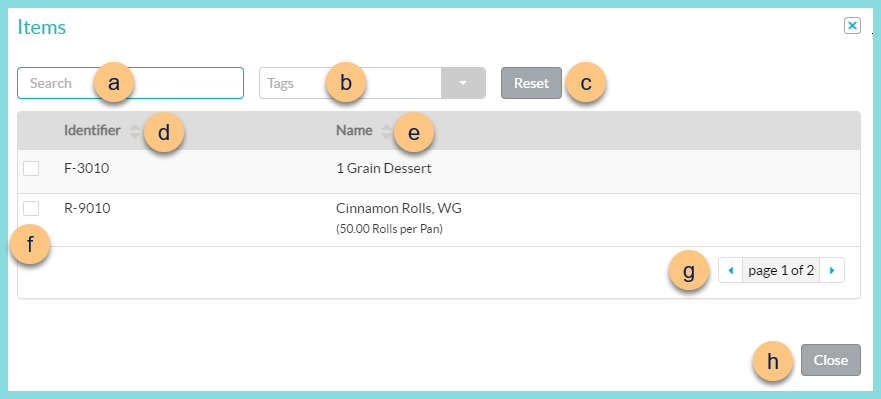
Search Items or click the Magnifying Glass to add inventory items to the count.
-
Search for inventory items permitted to be used at the selected warehouse.
-
Filter by itemTags
-
Click Reset to reset filters.
-
Click Identifier to sort by identifier.
-
Click Name to sort by name.
-
Check items to add them to the physical count.
-
Click the < > Arrows to scroll through pages if needed.
-
Click Close to return to the count screen with added items.
-
Notice any Notes including the note text, User, Date, and Time. Click < > to scroll through pages.
-
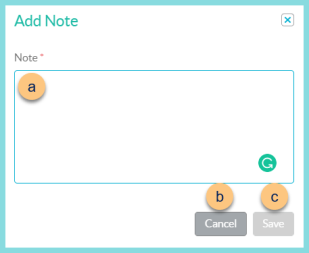
Click (+) Add New Note to create a note.
-
Enter Note text.
-
Click Cancel to return to the previous screen without saving the note.
-
Click Save to save note.
Note: Notes cannot be edited or deleting after posting. -
Click Delete to delete the count.
-
Click Close to return to the previous screen.
Note: changes are saved as they are made. -
Click Post Physical Count to Post the Physical Count. This will reset the quantities of the counted items to the quantities entered in Step 6.